Showing posts with label Recipe. Show all posts

Sunday, November 15, 2015

Don't leave home without it


Don't leave home without it

Smaller Icon For Two Blooms Newsletter on Website photo 2b7bb777-1362-4306-8f80-d00029bcb285.png
 
Your new breakfast friend.
Here’s one of the many joys of having a younger sister, she pushes your envelope sometimes and sometimes she brings ideas into the mix that you would never have considered.

Little Bloom is also known to find new things and then gets someone else to do it, for example one year she discovered a beautiful rose bush that she just had to have. We dutifully travelled to another island to buy this rare bush, she then helped to plant it in the ground and then never really looked at the thing again.  I was the one watering it, picking off the mites and then when the thing was in full bloom she would bask in the beauty.

Much the same with this recipe, Little Bloom found it, said she would make it and then the kale wilts in the fridge until someone else makes the recipe.  Although after we tried this, we haven’t stopped thanking her for finding it.
Poached Egg with Kale, Ryle, Tahihi and Yogurt from San Francisco’s Bar Tartine.

Serves 4

  • 3 garlic cloves
  • 6 TB oil, divided
  • 1 cup plus 2 TB roasted sunflower seeds, divided
  • 1 TB garam masala
  • ¼ green Serrano pepper
  • 1 ½ lemon juice
  • 2 tsp honey, divided
  • 1 tsp salt
  • 1 lb kale, stems removed and leaves torn into 1-2” pieces
  • 8 oz dark rye bread (we didn’t use bread this time, but it would be good)
  • 1 cup Greek style yogurt
  • 2 tsp distilled vinegar
  • 4 eggs
  • 1 TB sesame seeds roasted
  • 1 TB shelled pumpkin seeds, toasted
  • 1 TB golden flaxseeds,
  • Freshly ground pepper
You can roast the garlic, we used it raw.  Add 1 cup sunflower, garam masala, pepper, lemon juice, 1 tsp honey and 1 tsp salt, pulse on high speed, scrape sides until tahini is slightly thinner than peanut butter.  Add 1 TB water if too thick.

Heat 2 TB of oil and toss kale leaves in, add 2 TB water and sauté, add bread.  Get yogurt ready, add honey and salt, stir and set aside,  Poach your eggs.  To assemble, spread tahini in a large circle on four plates and spoon yogurt on top.  Distribute kale over yogurt and top with poached egg.  Garnish with remaining seeds and a drizzle of oil and season with pepper.

SO GOOD.

Keep up to date here.
  
Caron is one of the blooms of Two Blooms Design Studio Est. 2002. She is the dreamer, production manager, self taught chef and the social media wannabe. Caron is married to the word adventure and she will never stop dreaming.


Thursday, September 24, 2015

An apple pie you'd like to meet

An apple pie you'd like to meet


Smaller Icon For Two Blooms Newsletter on Website photo 2b7bb777-1362-4306-8f80-d00029bcb285.png
 
I love apple pie and have for a very long time. When I was a kid growing up in Toronto, Ontario we used to go Milton and visit Chudleigh's Apple Farm. It was a highlight every year. They had hay rides, a cool barn you could play in and to cry for apple pie with a crumble top. You could buy so many types of apples. You could sit down and order a slice of pie or take one home. We often had a slice while we were there and then bought a pie to take home.  Once we got home I remember the warm spices of the pie heating up in the oven and the excitement I would have when mom would say it was ready. It's a memory I still cherish to this day and I can still taste that Chudleigh apple pie crumble topping.

Living on Vancouver Island and selling at farmer's markets I see apples everywhere. In fact we have our very own apple and pear trees out back. This year we got an abundant crop and so we've been collecting them and finding all sorts of ways to use them. So naturally knowing we had too many apples and pears I decided to share with you our version of the Chudleigh apple pie that I treasured so many years ago as a kid.

As a side note this version comes from my time in Seattle, Washington. I got my bachelors degree in English in California and one of my good friends lived in Washington so I had the chance to spend time with her one summer.  Well, I ended up with a oven mitt (I think it was a gift). This is a twist on the Space Needle Apple Pie but it very similar to the Chudleigh Apple Farm version.

Okay let's get started.  

Apple Crumble Pie by Two Blooms
  • 4 apples (as many as you think you'll need to fill a 9" pie plate or whatever container you decide to use
  • 4 pears
  • a dribble of lemon juice
  • a shake or two of nutmeg
  • 3-4 shakes of cinnamon
  • 1 TBSP flour (can sub with gluten free flour or finely ground oatmeal)
  • 1 tsp of vanilla
  • 1/2 cup of sugar
If you are following this portion to a T then peel and slice apples and pears (we leave the skin on). Then add all other ingredients and mix well. Put in a 9' pie plate. If you want you can use a store bought crust or whip up your own. We like to save on the calories so skip the crust part.


Cut apples and pears from our bounty.
 
Now this above part is really ab lib so experiment. What Caron (the other bloom) and I did was skip all the additions and just cut up our apples and pears and plopped them in our corningware dish and then went straight to the topping part and it was still divine.

Okay onto the dreamy filling:
  • 2 cups of flour (feel free to sub this with gluten free flour, we used oatmeal in our version and we didn't grind it either)
  • 2 cups of brown sugar (we used only 1 cup and used that organic coconut sugar)
  • 1/2 - 3/4 cup of margarine (we subbed in 1/4 of olive oil and 1/4 cup of coconut oil)
  • 1/2 cup of walnuts (optional) we skipped this part
Mix until moist, I found with our substitutions that we needed more moisture so just kept adding water until it looked just right.  Bake at 350 degrees Farenheight for 40 minutes.

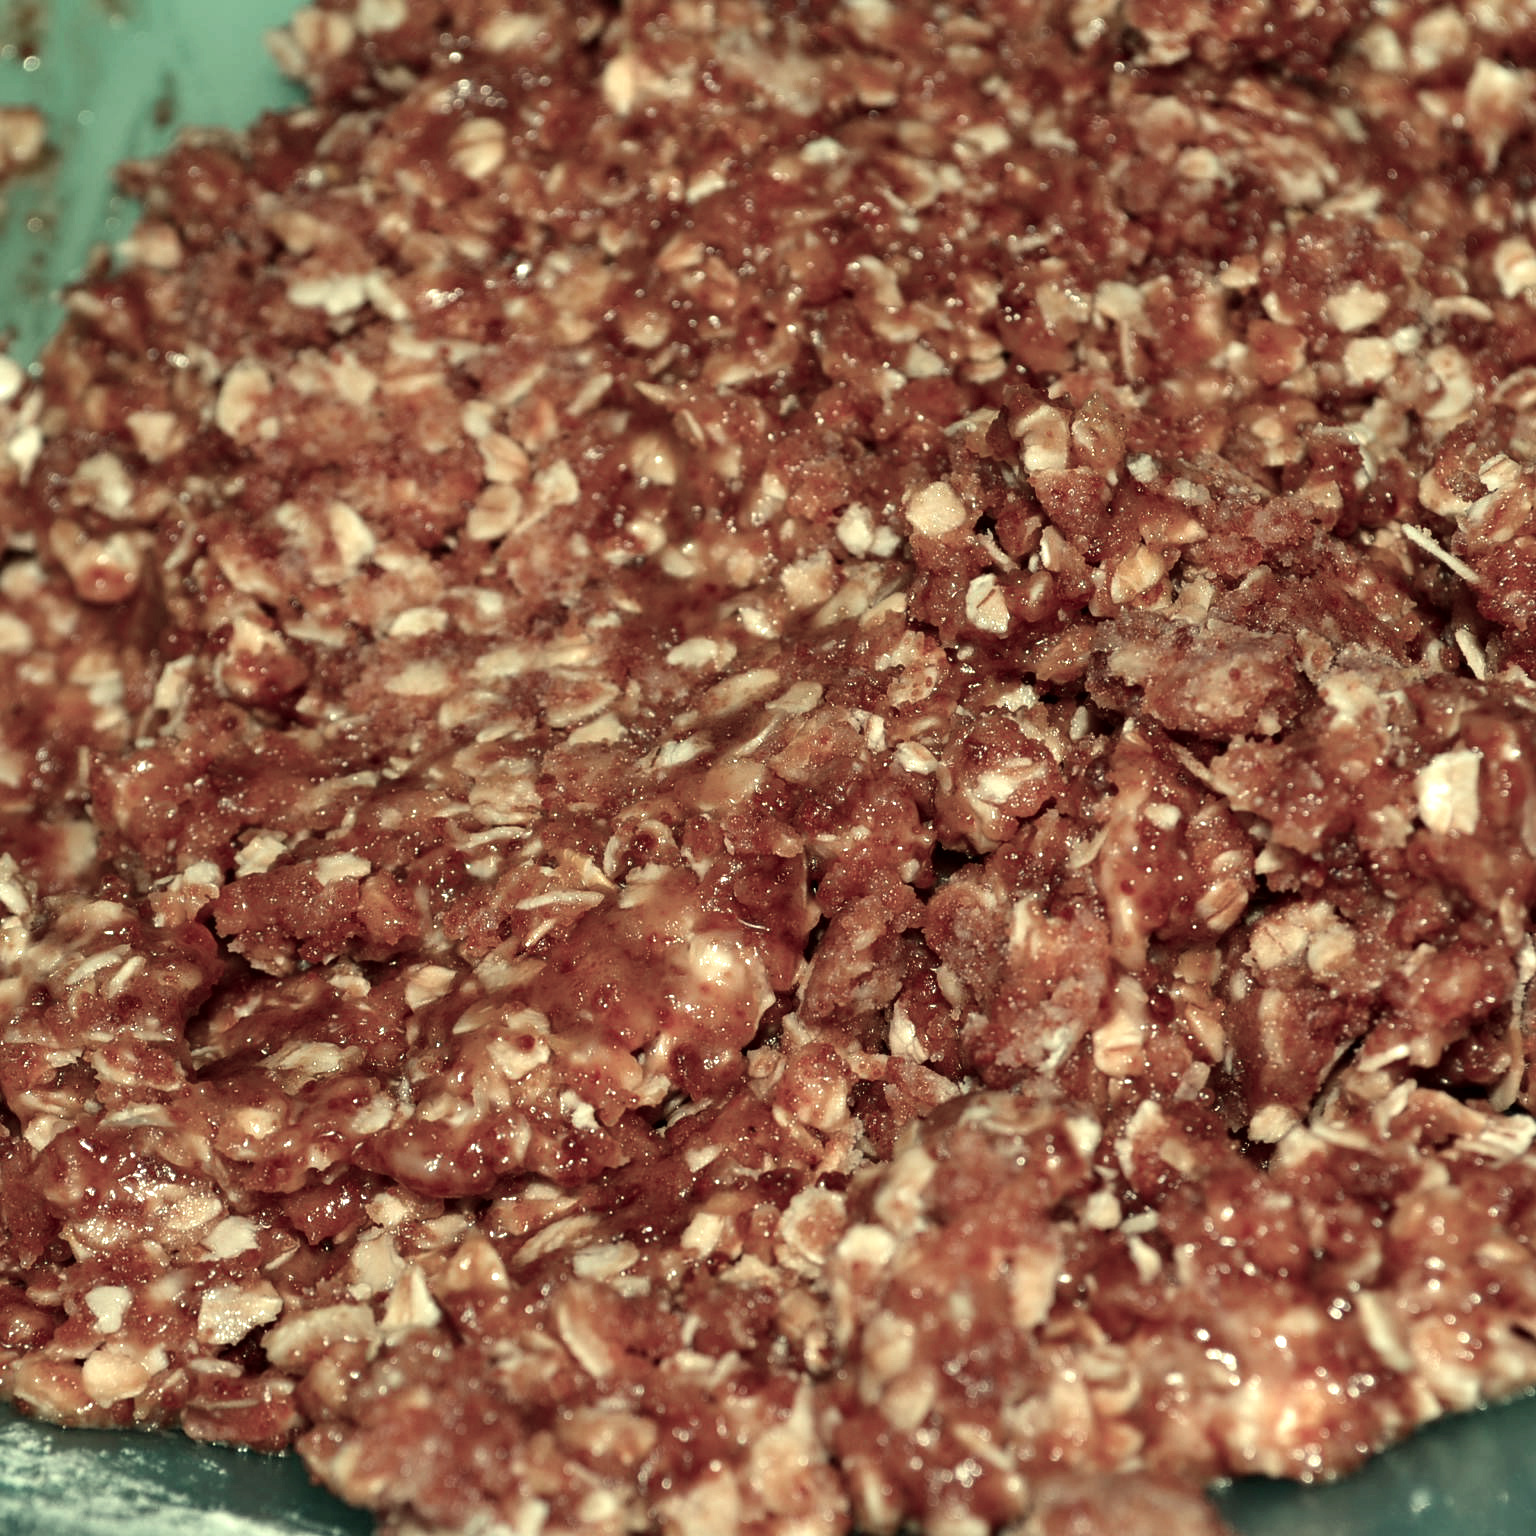
 Mixing the oatmeal topping

 Once you have the topping mixed you just add it to the top of the fruit. I just put it on top with a spoon.

The cooked Apple Crumble Pie
 
Have fun with this recipe. Add in other fruits for the crumble.  It's wonderful on it's own or pair it with frozen yogurt or ice cream. 

I'd love to hear your thoughts if you make it. This time of year it's perfect for autumn weather.

If your looking for skin food to compliment this recipe try our Organic Vanilla Earl Grey or Organic Tofino Morning Chai Soap.  

Like this post, then check out our blog and catch our new posts immediately.
 

Hi, I’m Michelle the founder of Two Blooms Design Studio Est. 2002. I’m in charge of production, designing all of our labels in house, photography, customer service, alchemist behind all of our scent blends, designer, creator and pretty much whatever else needs to be done.

Saturday, August 29, 2015

Looking for a Wheat Free Vegan Snack?


Looking for a Wheat Free Vegan Snack?

Smaller Icon For Two Blooms Newsletter on Website photo 2b7bb777-1362-4306-8f80-d00029bcb285.png 
 
We LOVE making our own flax seed crackers and you can control the amount of heat or salt you want to put in them.

Here’s what you’ll need:
  • 2 cups of whole flax seeds (try and get organic if possible)

  • Approximately 2 cups of water

  • ¼ cup tamari or Braggs or soy sauce (optional, we don’t use this but its yummy)

  • Sea salt to taste (only add if you aren’t using the above)

  • 1 TB fresh herbs or whatever you have in your pantry

In a large bowl cover the flax seeds with water and let them soap for at least 2 hours.  It will become quite gelatinous.  We sometimes put half the seeds in a high speed blender just to add some variety to the mix.

You want the seeds gooey and runny not a thick clump (ask me how I know this :)

Add seasonings, herbs or salt.  Feel free to add some lemon or lime juice, some heat (hot pepper sauce etc.)

Take a couple of spoonfuls and spread it thin (1/8”) on a pan or a dehydrator sheet.
Set your dehydrator or stove to 100 degree F for about 4-6 hours.

Check them after 4 hours and flip them over to get both sides crispy.  Break or slice into pieces, store in a plastic container.  Spread with humous, avocado or omit all the savoury flavourings and top with nut butter and jam. 


P.S. We are checking our comments so let us know if you try it.
  

Caron is one of the blooms of Two Blooms Design Studio Est. 2002. She is the dreamer, production manager and the social media wannabe. Caron is married to the word adventure and she will never stop dreaming.

Saturday, August 22, 2015

Mouth watering Zucchini Noodle Pad Thai

Mouth watering Zucchini Noodle Pad Thai


Photo Credit:  Google Images


Smaller Icon For Two Blooms Newsletter on Website photo 2b7bb777-1362-4306-8f80-d00029bcb285.png

It's been pretty hot here on Vancouver Island this summer and you know those muggy days where you just don't feel like eating much. Lately I've been craving lighter vegetarian meals so I was thrilled when Caron (the other bloom and my sister) found this divine vegan recipe. We had it earlier this week and it is one of my new favourites.
Here is what you'll need for the noodle part:
  • 2 zucchinis (spiralized see below)

  • 2 TBSP olive oil

  • 2 large cloves garlic, minced

  • 1 red bell pepper, seeded & sliced

  • 4 green onions, sliced

  • 2 cups bean sprouts

  • 1/4 cup raw cashews (Reserve before serving)

  • some lime wedges for serving (optional)

The sauce:
  • 2 TBSP rice vinegar or white vinegar

  • 1-2 TBSP fish sauce

  • 2 TBSP ketchup

  • 1 teaspoon (5ml) packed brown sugar

  • 1/2 tsp cayenne pepper

  • 1 tsp chili garlic sauce

  • 1 tsp Soy Sauce

  • 1 TBSP toasted sesame seeds (add before serving)


    Directions:
  • Get Your Zucchini and use a Spiralizer or veggie Peeler

  • Put a TBSP of Olive in the pan and add heat to cook

  • Add your garlic, pepper, green onions & bean sprouts and cook for about 3-4 minutes or until done

  • While you are waiting prepare your sauce & toast your sesame seeds

  • Once your veggies are cooked pour into bowl and add sauce

  • Before serving add your toasted sesame seeds and cashews and serve

  • We pan fried our noodles right before serving for 3 minutes but next time we'll use them raw, heating them made them a little mushy but still very good.

For other variations add:  meat, chicken or tofu.
You now have a recipe that will impress your family/guests. Let me know in the comments if you try it out.  Like what you've read? Keep with us at our blog.


Hi, I'm Michelle the artist, visionary, creator and designer of Two Blooms Design Studio. I moved from a big city to Vancouver Island and fell in love with the west coast. My world is surrounded by beautiful scents, on trend design and endless possibilities.

Monday, July 20, 2015

Zucchini Zoodles Raw Recipe

Zucchini Zoodles Raw Recipe

Photo Credit:  empoweredsustenance.com


There was a time in our lives when we decided that a myriad of health issues could be solved with a raw, vegan diet.  So in typical fashion, we embraced the lifestyle wholeheartedly and did this for 18 months straight!

We went online, purchased raw vegan recipe books and became experts on the best blenders (we have a Vitamix and highly recommend this brand) and dehydrators (we own a Excalibur and recommend this brand).  The lifestyle did what it promised, health issues dissolved, fat melted away and we became raw foodies, even travelling to Maui for 3 weeks and continuing with the raw food plan.

We even assembled our own recipe book with tried and true favorites including the zucchini zoodles that we’d make for a fast treat.  We bought an inexpensive spiralizer and its still with us.

Here’s the recipe:

  • 1 zucchini
  • Your favorite dressing.
Peel your zucchini and chop into 3 inch rounds.  We don’t like having our noodle being 18 inches long, so we came up with cutting the zucchini midway (half the circumference).  This allows short curls but you can do whatever you like.  Go through each of the zucchini rounds and spiralize them.  Here’s where you can get creative, throw in some peas, chopped carrots, corn nibblets, anything in your fridge, celery, marinated artichoke hearts, the sky is the limit.  If you have some cold cooked chicken throw that into the salad, tomatoes…anything goes, the goal is to get more raw veggies into your diet.
You can use your favorite dressing and you’re ready to go.  Or you can make your own creamy dressing.  We usually threw a handful of soaked cashew nuts in the blender (we love our Vitamix), add some lemon juice or vinegar, basil leaves, hot sauce and some water to thin it out.  Dress your zucchini zoodles and enjoy a fresh new way to enjoy salad.  

See our new blog posts.
 
About Caron
Caron is one of the blooms of Two Blooms Design Studio Est. 2002.  She is the dreamer, production manager and the social media wannabe.  Caron is married to the word adventure and she will never stop dreaming.


Monday, July 06, 2015

Match Tea Go Go Bars Recipe

Photo Credit:  Michelle Somers

I love Matcha Green Tea lattes. We’ve even used it in our soap for a lovely green colour.  There are days when I’m on the go a lot like running a bunch of errands and I don’t want to go out and order a meal because it takes extra time during my day (although sometimes that’s a good thing). Or maybe I’m hiking and want to pack light nutritious snacks to just munch while I'm enjoying the great outdoors. Maybe some of you have kids and want to pack them a healthy lunch snack. Or you are running out to a fitness class and want a snack after you are finished.

Granola bars have always been a fun treat to eat but adding Matcha Tea makes them extra  special. Did you know that Matcha Green tea is full of antioxidants?  It has the nutritional benefits of 10 cups of regular green tea.  It’s rich in vitamins, chlorophyll and fiber.   It can boost metabolism and help burn calories (but you have to be watching what you are eating and exercising as I know some people think they can eat whatever they want and drink Matcha Tea (if only it were that simple).

We used to host International students at our house as we live near a university and one year a student from Japan brought us Matcha Green Tea and a ceremonial Japanese tea whisk with instructions. Every time I use it I think of her.

Steps to make the Matcha Tea Go Go Bars Recipe Photo Credit:  Michelle Somers

Here is the "Matcha Tea Go-Go Bars" in a handy recipe card. Click to read, then there is a little arrow type button on the bottom kinda pointing in one direction and if you click on that there is an option to download it.

Tips for making this recipe.  Really cut dried fruit finely or bars are harder to cut. If you leave it in the fridge too long before cutting it's crumblier. A lower bar height wise will produce a cleaner cut.
Have your tried Matcha Green Tea or used it in some special way?  #IBN30

See our bloom worthy blog.

About Michelle
Michelle is one of the blooms and founder of Two Blooms Design Studio Est. 2002. She is in charge of production, designing all of our labels in house, photography, customer service, alchemist behind all of our scent blends, designer, creator and pretty much whatever else needs to be done.


Monday, June 29, 2015

Epic Fail Cinnamon Roll Pancakes

Cinnamon Roll Pancakes Photo Credit:  kodiaccakes.com


See that photo right there, yup that's right folks I was drawn in an lured by such deliciousness. A little bit of history here I'm a 'cinnamon roll' connoisseur. Where ever I've lived I made sure to find the best cinnamon rolls I could. I even worked at a cinnamon roll store when we lived in Kailua-Kona, Hawaii (I'll probably chat about that in a later post). Just recently I found divine cinnamon rolls here in Victoria, BC. Also when I have time on my hands I make my own but that is very rare these days but I'm getting off track here.  So you can see why I was lured by this divine looking recipe.

Dear readers to save you the agony of making the mistakes I did, with the help of my sister I'm going to explain why these disasters took place.  First I'll post the recipe so you can then understand why things slowly began to unravel in my two attempts to make these beauties. Now I'm not posting the link to the recipe in order to protect the innocent here and the fact that I made some tweaks here (what else is new, and maybe that is why they didn't work, but I think not as my subs were pretty minor except the first time).

Cinnamon Roll Pancakes

  • 4 C of flour
  • 8 tsp of baking powder
  • pinch of salt
  • 4 C of milk (you can use alternatives to milk like almond, rice or hemp). I used almond milk and replaced the 4th cup with water
  • 4 TSP of Sunflower oil (another oil will work fine)
  • 3 large eggs, lightly beaten
  • little splash of vanilla extract
  • nice bunch of coconut flakes
  • Mix dry and wet separately and then combine together.
  • (Pour into your pan in circles forming pancakes)

Filling

  • 1 C of butter melted (you can sub with some coconut oil if you don't have any on hand)
  • 1 1/2 C of packed brown sugar
  • 2 tsp ground cinnamon
  • (Mix three ingredients together, put in baggie and snip one end and pour over batter in a swirl like motion)

There was a another part called Cream Cheese Glaze but in my opinion that is overload. They are great without it and we're saving calories here.  Okay now the fun part of making these precious things (insert sarcasm here).


 Cinnamon Roll Pancakes First Time, they look so innocent here. Photo Credit:  Michelle Somers

The first time I made the batter I had a hard time getting the lumps out with a whisk. Yeah I could have gotten out the beaters I suppose but I was lazy so kept whisking. Well I decided to add water to thin out the batter because I really love crepes more then pancakes. So the batter ended up being too thin to work with. Then I made the filling exactly like written and put it in the bag but it looked like soup and I kept wondering how I was going to pour this out. So being the smart one I am I handed this off to my sister to deal with and then heard her moaning that something was terribly wrong with the recipe. Well this isn't in the recipe but put this in the fridge for at least 20-30 minutes. Once it firmed up it was a bit better to work with but a bit too thick to pour out. The other problem is the brown sugar kept burning on the pan when you go to flip the pancake. We ended up blobbing the topping on top and just eating it like that.
Second time around (what was I thinking to try this again?) I made the batter but didn't add any extra water and it was much thicker and easier to work with.  I didn't have any butter for the filling so thought I'd try coconut oil. Well the filling just ended up being to thick because the coconut oil just keeps absorbing in the sugar. Again we blobbed it on the top and this time it make this sort of crispy caramel like topping which was quite divine.
The pros: the base recipe works great, the filling try at your own risk or search for another filling. You can also make up your own filling like jam, pour on maple syrup (yup we are big into that in these parts), smear on peanut butter and top with bananas, use yogurt with a bit of honey. I could go on and on but I'll leave that to your imagination.
The cons: the brown sugar burns in the pan, on searching for an image I found a recipe that shows a teflon pan being used and we did not use a teflon one. If you use the filling don't sub butter for coconut oil unless you want a crispy like top that you can blob on.
Have you had any cooking disasters recently?  #IBN30

See our posts right when they are published.

About Michelle
Michelle is one of the blooms and founder of Two Blooms Design Studio Est. 2002. She is in charge of production, designing all of our labels in house, photography, customer service, alchemist behind all of our scent blends, designer, creator and pretty much whatever else needs to be done.

Monday, June 22, 2015

Better then Junk Food Crispy Chick Peas Recipe

Raw Chick Peas Photo Credit:  ocinotes.wordpress.com

Today I'm sharing with you a chick pea recipe that I dearly love and it holds a special place in my heart.  Years ago I had the amazing chance to go the Philippines to work as a volunteer with a humanitarian aid organization.  I lived there among the people and culture for 3 months (I may chat about that experience in a future post). One of the snacks I loved while I was there was cooked chick peas that were flavoured with curry and salt. You would buy them in a clear baggie and pop them in your mouth like popcorn. To this day I love chick peas and always remember the Philippines.

Chick peas are so good for you for many reasons. They are high in protein, low in fat, rich in zinc and folic acid and a healthy source of carbohydrates.

Better then Junk Food Crispy Chick Peas
  • 1 1/2 cups of raw chick peas (makes about 3 cups cooked) You can buy them in a can but they are so high sodium and honestly the raw taste so much better for this recipe. I tried them both with raw and cooked and the canned are more dense and mushier (still good just not the ultimate that they could be)
  • 1 1/2 curry powder
  • 1 tsp garlic powder
  • 1 tsp onion powder
  • 2 TBSP of olive oil for your pan
  • Cast Iron pan
  • Salt to taste                                                                                                                                                               
1.  First you want to take your 1 1/2 cup of raw chick peas and put them in a pot and cover them with water (no heat needed you are not cooking them yet) and soak them overnight. This
is the trick to plump them up. 

Photo Credit:  onceuponachef.com My photo came out blurry.

2.  After they've soaked overnight, rinse them thoroughly and put in a pot with water and cook  them until they are soft.  

3.  After they are tender, rinse them again and put them in a clean towel for at least  10 minutes to get them as dry as possible (I wrapped them up like a mummy and kept batting them around to get them all dry.)  

Photo Credit:  Michelle Somers

4.  Get your pan (cast iron work really well) with oil heated up, once the oil is hot, toss the dried off chick peas in and keep shaking them in the pan.  It takes at least 10 minutes before they start crisping up.  

5.  Once they are crisped up, transfer them to a bowl. Now take your seasonings (be creative, use whatever you have on hand, I saw a recipe for blackening seasoning which would be so good but I didn't have on hand. Throw in hot sauce, whatever you want).  Sprinkle the seasoning over the chick peas tossing them to coat.  

6.  Once they cool, eat (although we can never wait until they cool down, we eat them hot:)

Photo Credit:  Michelle Somers

If you don't want to crisp them in a pan you could try (after step 3) putting your chick peas in a pan and baking them in the oven or a toaster oven. I'm planning to try that next.

I'd love to hear what snacks you enjoy whipping up in the comments below. #IBN30

To keep up with bloom worthy news. See our new blog home. 


About Michelle
Michelle is one of the blooms and founder of Two Blooms Design Studio Est. 2002. She is in charge of production, designing all of our labels in house, photography, customer service, alchemist behind all of our scent blends, designer, creator and pretty much whatever else needs to be done.